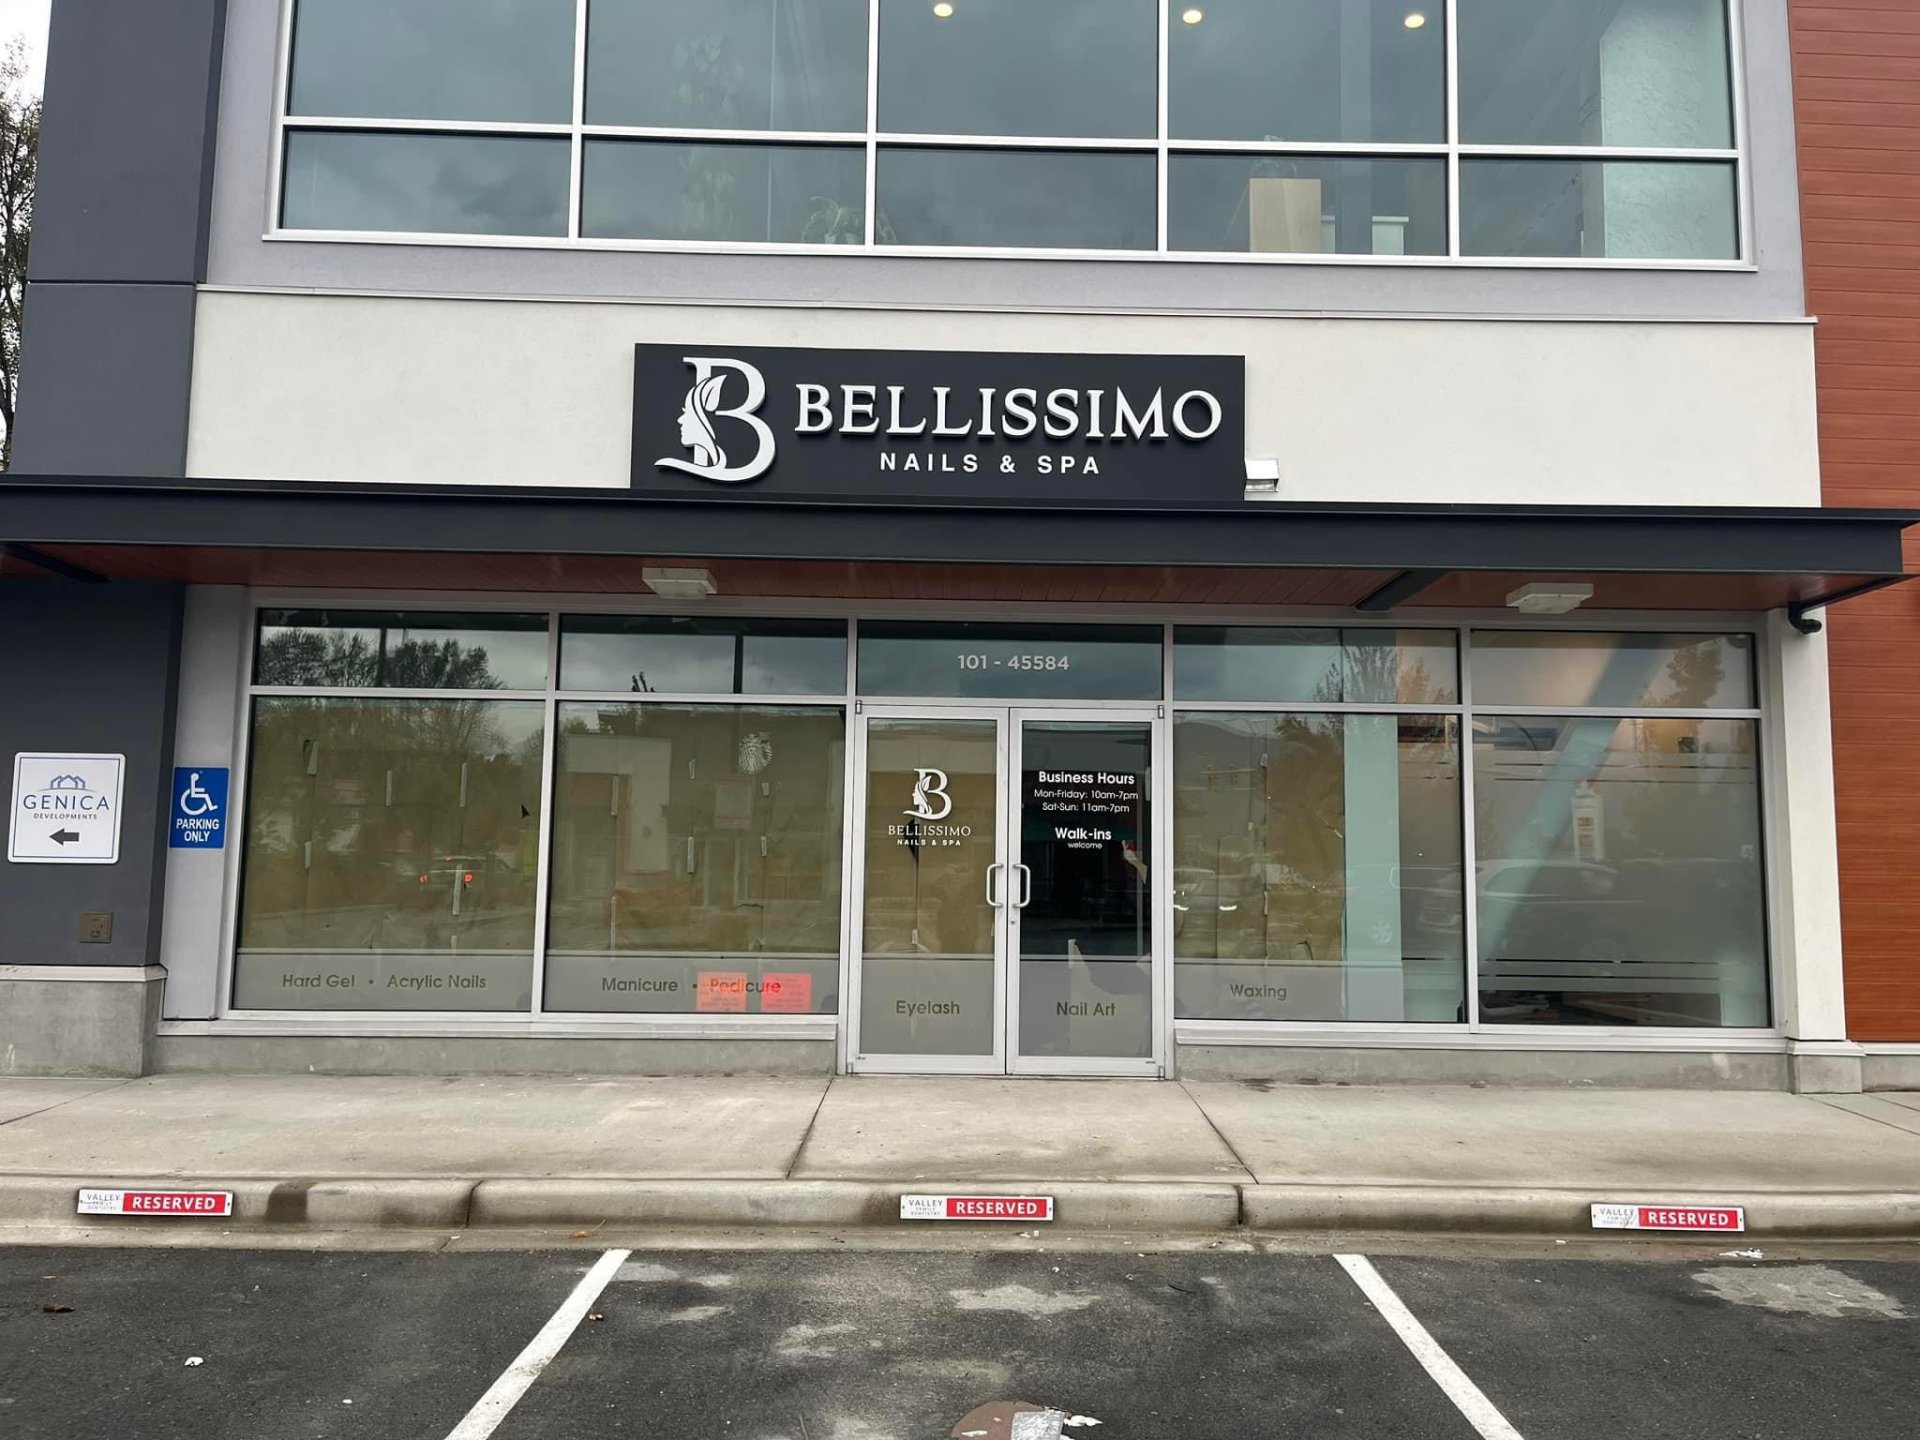
From the photo, this appears to be a professionally manufactured and installed illuminated channel letter fascia sign for a nail salon. Here's a breakdown of the project:
Overall Job Description
- Project Type: Complete exterior storefront sign.
- Business: Bellissimo Nails & Spa.
- Application: Commercial retail storefront.
- Sign Type: Illuminated 3D channel letters with logo mounted on an alu caninet
Design
The design has a clean, premium appearance suitable for a beauty business.
Logo
- Large stylized "B" incorporating a woman's face and flowing hair.
- Creates a recognizable brand icon.
- Logo is proportionally larger than the text, giving the storefront a luxury feel.
Typography
- "BELLISSIMO"
- Large serif font.
- Individual illuminated letters.
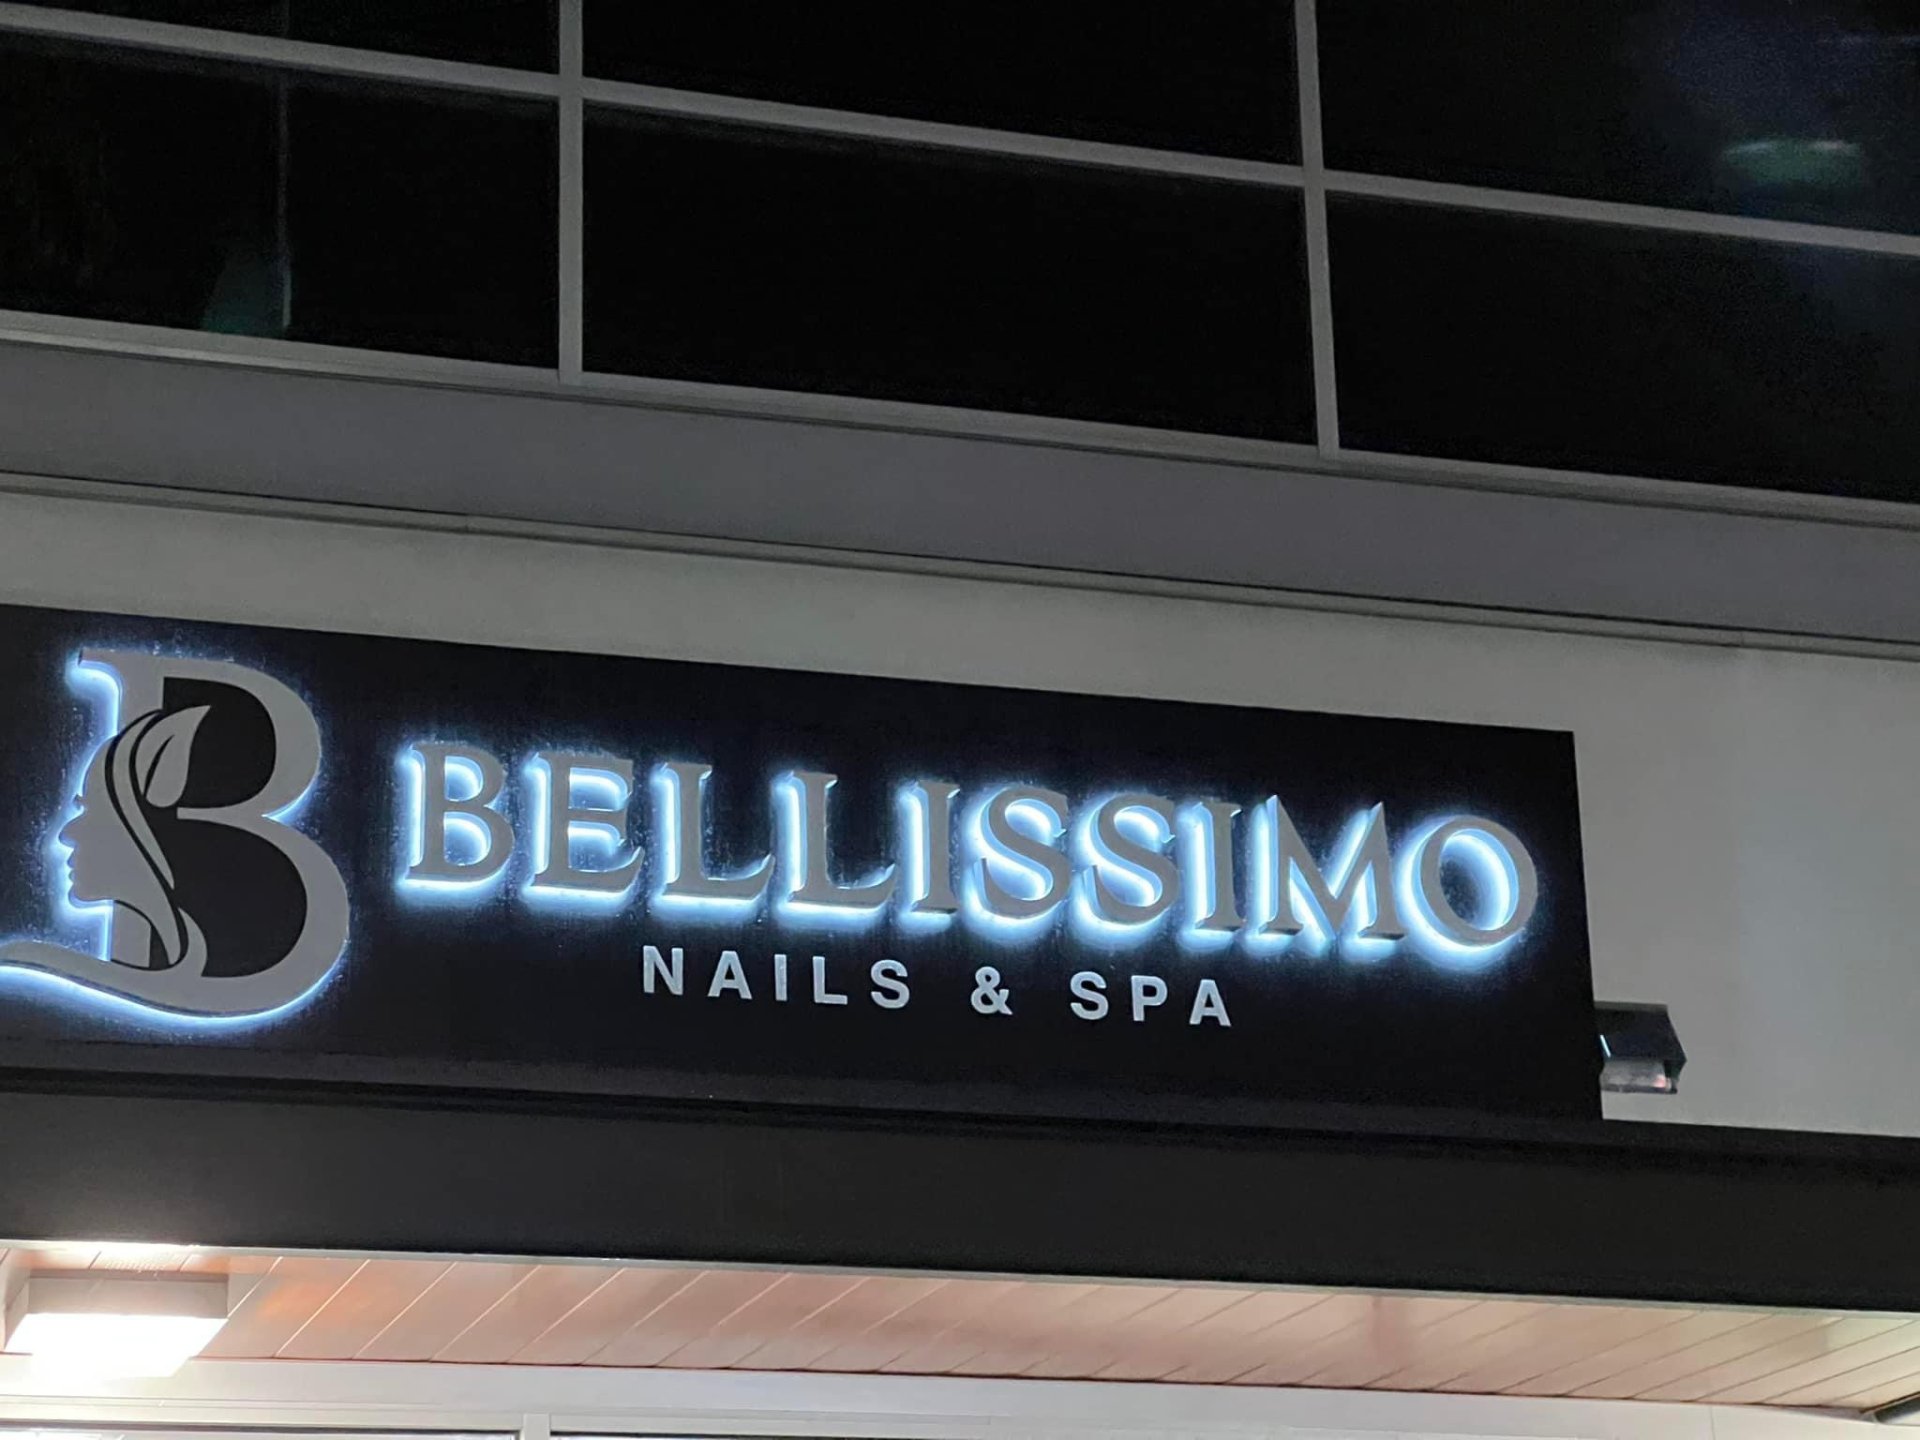
- White face with cool white LED illumination.
- "NAILS & SPA"
- Smaller sans-serif letters.
- Used as secondary information.
- Better readability from close distance.
Color Scheme
- Black background panel.
- White illuminated letters.
- Cool white LEDs (approximately 6000–6500K).
- High contrast for nighttime visibility.
Sign Construction
Based on the image, the sign likely consists of:
- Aluminum Composite Panel (ACP/Alupanel) painted black.
- Fabricated aluminum channel letters.
- Acrylic letter faces.
- Internal LED modules.
- Remote power supplies/LED drivers.
- Waterproof electrical connections.
- Hidden raceway or rear wiring behind the panel.
The halo around each letter appears mostly due to the camera exposure. The sign itself looks like front-lit channel letters, rather than true halo-lit reverse channel letters.
Permit Requirements
For most municipalities in British Columbia, a project like this would typically require:
- ✔ Sign permit application
- ✔ Scaled elevation drawing
- ✔ Site plan showing sign location
- ✔ Letter dimensions
- ✔ Electrical details
- ✔ Sign area calculations
- ✔ Structural attachment details
- ✔ Landlord approval (for commercial plazas)
- ✔ Electrical permit if a new power circuit is installed (depending on jurisdiction and scope)
Depending on the size and mounting method, structural engineering may or may not be required.
Installation Process
A typical installation would include:
- Site measurement and verification.
- Fabrication of the ACP backer panel.
- Manufacture of illuminated channel letters.
- Pre-wiring and LED testing in the shop.
- Locating wall framing or structural members.
- Installing the backer panel securely to the building.
- Running electrical wiring into the building.
- Installing LED drivers in an accessible location.
- Connecting to a dedicated electrical circuit.
- Testing illumination during both daytime and nighttime.
- Applying weatherproof sealant around penetrations.
Quality Assessment
From what is visible:
Strengths
- Professional spacing and alignment.
- Consistent letter illumination.
- Clean mounting with no visible exposed wiring.
- Premium, upscale appearance.
- Excellent contrast against the black background.
- Strong nighttime visibility.
Minor Observation
- The glow around the letters is likely exaggerated by the camera's exposure and lens flare rather than indicating uneven lighting. The illumination itself appears consistent.
Estimated Scope
A project like this would generally involve:
- Custom logo design (or preparation of customer artwork)
- Permit drawings and municipal approval
- Fabrication of illuminated channel letters
- Fabrication of ACP backer panel
- Electrical components and LED drivers
- Professional installation
- Final testing and commissioning
Overall, this is a well-executed commercial sign project that combines branding, permitting, fabrication, electrical work, and installation into a polished storefront display.
More from this project
Let's build yours next.
Send us the site details and we will scope a sign that fits the frontage, the budget and the approvals.